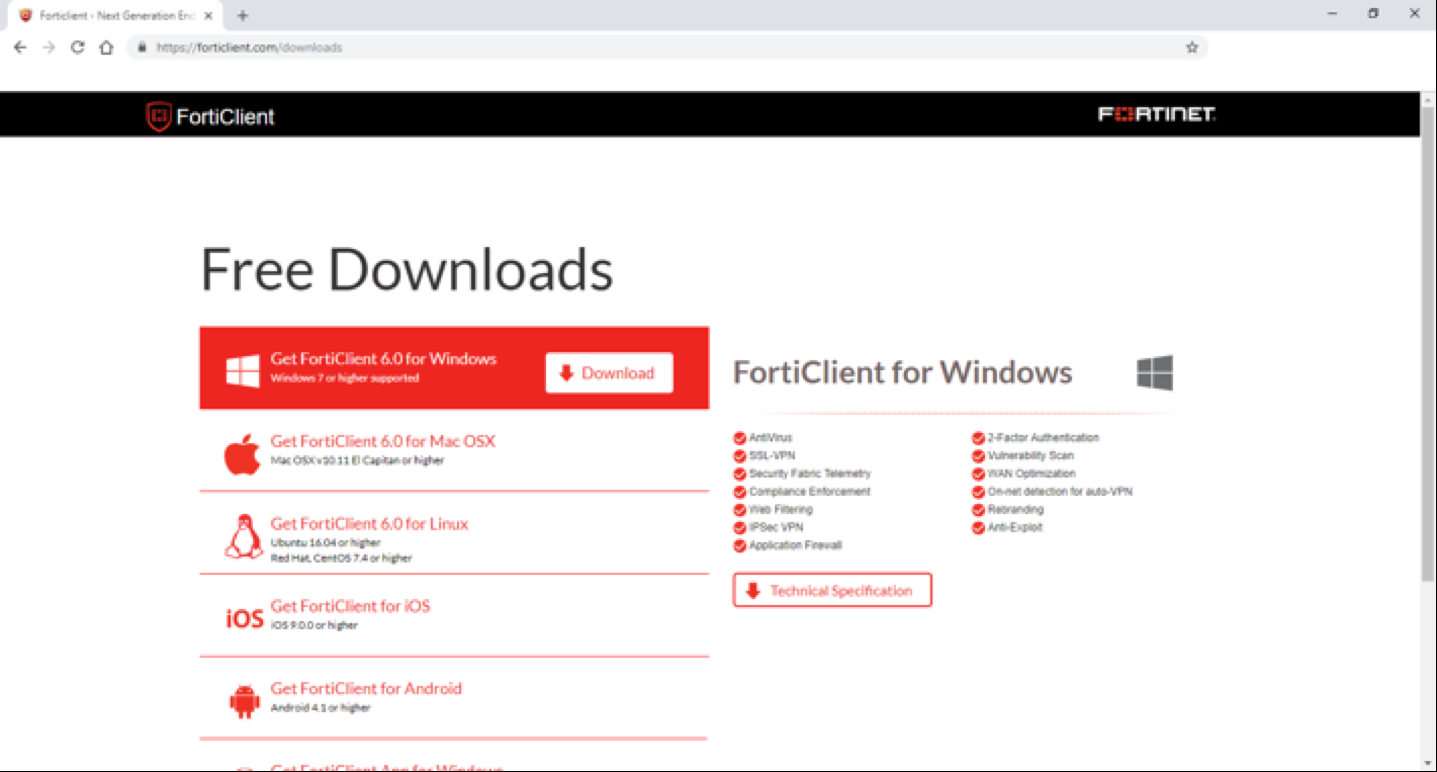
- Navigate to https://forticlient.com/downloads from your web browser.
- Download “FortiClient VPN” application for your OS.
- NOTE that this is not the same application as the other types of FortiClient available on this page.
- Once download is complete install the application. Windows users should run the installer as administrator, or if you don’t have a permission ask your administrator to do so.
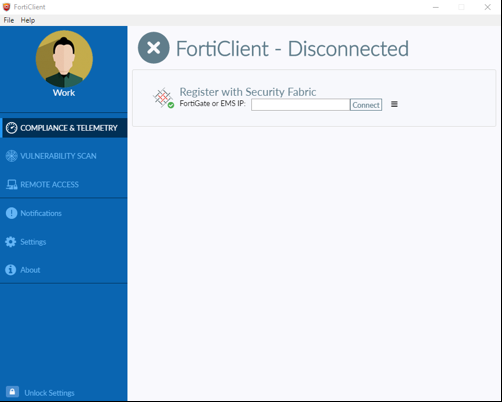
- Open FortiClient.
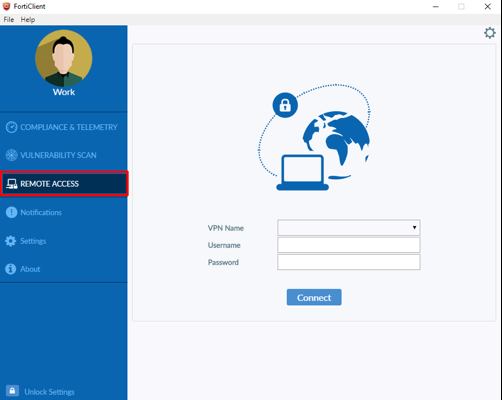
- From the left side tab select Remote Access.
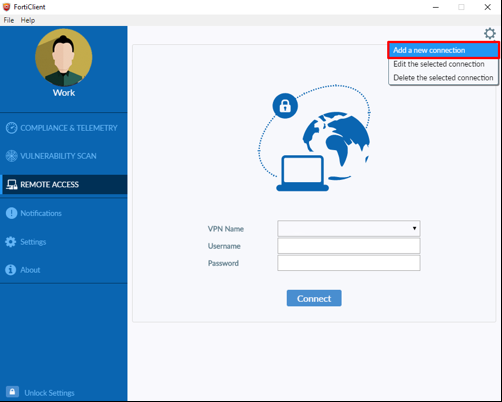
- Click the gear icon on the top right of the interface
- Click Add a new connection.
- New VPN Connection settings will open.
- Select the SSL-VPN tab.
- Complete the New VPN Connection settings as follows:
| VPN: | SSL-VPN |
| Connection Name: | <Company Name> |
| Description: | <Company Name> |
| Remote Gateway: | <Public IP of the Firewall> |
| Customize port: | (Normally 8443) |
| Client Certificate: | None |
| Authentication: | Save login (note: this will not save the password) |
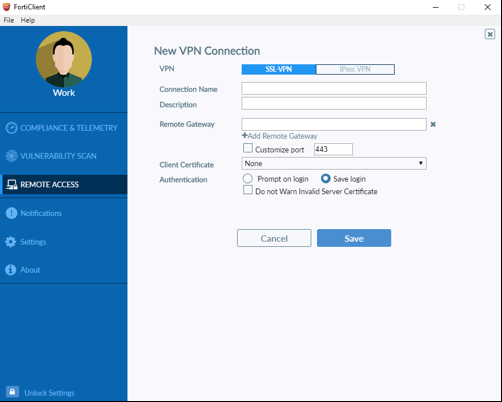
11. Click Save.
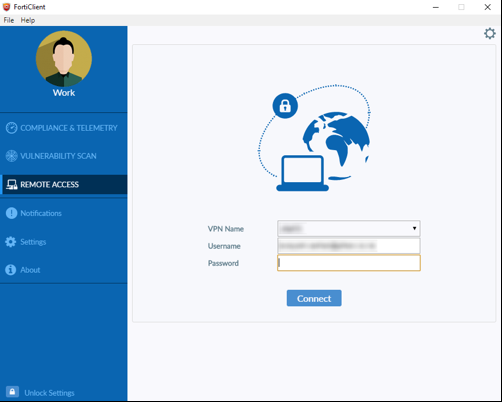
12. Once done you will return to the Remote Access page. Select the Desired VPN name.
13. Type in your Username and Password.
14. Click Connect
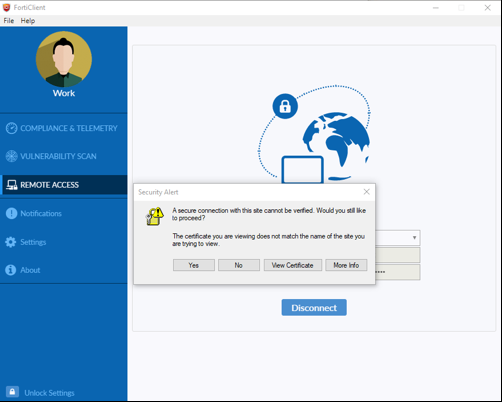
15. Depending on the configuration of the target firewall, you may receive a certificate warning. It is generally OK in the context of these SSL VPNs click through this warning.
16. Click Yes.
17. Your SSL VPN connection is now established, and you should be able to connect to the services that are allowed via the VPN policy set (which will vary by target firewall and user).

How to setup MFA
Your administrator has almost certainly configured multi-factor authentication (MFA) to secure your VPN access. The FortiToken Mobile smartphone application allows you to install MFA tokens for use with FortiClient VPN authentication. You can download the free FortiToken Mobile application for Android from the Google Play store, and for iOS from the Apple App Store.
After your system administrator assigns your token, you should receive a QR code via email (be sure to check junk folders if you don’t see the email). If you do not activate your token by the expiry date, you must contact your administrator so that they can reassign your token for activation.
Activating your FortiToken Mobile MFA
STEP 1:
On your smartphone, open the FortiToken App. Depending on your phone type and settings, you may be prompted to create a PIN that will be used to securely access the application. This can also be set up and changed via the settings menu.
STEP 2:
In the top right corner, tap the add icon. This will open the activation wizard. There will be two options given to add a new token: Scan Barcode; and, Enter Manually.
Option 1: Scan Barcode
Inside the activation email received, there will be an attachment with a QR code. Open or preview the attachment.
Next, select the Scan Barcode option in the wizard. Hold your phone’s camera up to the QR code on your screen until the frame is filled with the QR code and the wizard registers your token.
Option 2: Enter Manually
Inside the same email there should be a 16-digit code in quotation marks. Have this code ready.
Next, select the Enter Manually option in the wizard. Then select the Fortinet account option at the top. Fill in the requested fields with your email address and the 16-digit code.
Tap done/add account.
Providing your FortiToken Mobile MFA code when authenticating
Once activated, you should receive a push notification to your FortiToken Mobile app each time you successfully provide your login name (email address) and correct password, when establishing the VPN. If you do not receive a push notification, you can open the FortiToken Mobile application and enter the 6-digit MFA code manually into the FortiClient application when prompted to do so.
NOTE: You should take care not to accept any such push notifications that you were not expecting.